Showing posts with label Recipes. Show all posts

Sunday, February 10, 2013

Crusty No-Knead Bread


I love bread. A lot. I can pretty much not get enough of it (much to my thighs dismay). I think bread is at its best when it is soaking up gravy or soup or stew. You need a pretty hearty piece of bread to hold up to some of my stoups (soup/stew hybrid). It has to be soft and spongy in the middle to soak up all the deliciousness of the dish but I also like a thick, hard crust though too. I want both! I want it all! Is that too much to ask for? Am I being greedy??

So then I found this recipe on Pinterest for a hard crusted large loaf of bread. I had to try it and try it I did! It was everything I had hoped for! 

Crusty No-Knead Bread

Ingredients:
  • 6 cups bread flour (or all-purpose flour; I used 4 cups of all-purpose flour & 2 cups of whole wheat flour)
  • 1/2 tsp. instant or active dry yeast
  • 2 1/2 tsp. salt
  • 2 2/3 cups cool water
  1.  In a large bowl, combine the flour, yeast, and salt. Add the water and mix until everything is well combined. The dough will be very sticky. Cover the bowl with plastic wrap and let the dough rest for 12-18 hours at room temperature. I mixed my ingredients and then just left the dough on the counter overnight. When the dough is ready, it will have risen and will be dotted with bubbles on the surface.
  2. Flour your hands and your work surface lightly. Place your dough on the your work surface and sprinkle with more flour. Fold the dough over a few times and work it into a ball pinching a seam underneath.
  3. Generously (really generously) dust a cotton towel (not terry cloth) with flour to prevent the dough from sticking to the cloth as it rises. Sprinkle more flour on the dough and cover with the edges of the towel or another towel and let rise for another 2 hours or until doubled in size. I used a flour sack towel. It worked perfectly and was big enough to just fold the corners up over the dough to rise. Do not skimp on the 'flouring of the towel' step. The first time I made this recipe I had a bit of a sticky mess attached to my towel. Sad face. 
  4.  After 1 1/2 hours, preheat your oven to 425°. Place a 6-8 quart dutch oven (or any heavy covered pot) in the oven as it heats up. 
  5. When your 2 hours are up and your dough is fully risen, remove your dutch oven carefully from the oven. As carefully as you can, remove the top towel or top folds from your dough ball and flip the dough into the hot pot seam side up. 
  6. Cover and bake for 40 minutes and then uncover and bake for 10-15 minutes more until the crust is a dark golden color. 
  7. Remove the bread from the pot and let cool completely on a wire rack before slicing. Enjoy!!


what you will need
mixing dry ingredients in my awesome pink bowl
I prefer the hand mixing method
after all the ingredients are mixed, fight with the plastic wrap to get the bowl covered. Sorry no pics right now of the dough after the 12-hour rise. I will take some and post them tomorrow! ;-)
This is my very old, very well-loved gifted Dutch Oven
And here it is! Isn't that crust beautiful!?
 

Thanks for stopping and God bless!!


Homemade Chewy Granola Bars


Good mornin' all! Once again the Midwest is being hammered by another round of rain, sleet, snow, and wind. So, I am staying home from church...again. Sad panda. But, I can take this time to share with you this terrific recipe for your very own Homemade Chewy Granola Bars. My kidlets LOVE them and I know they are not filled with a bunch of random ingredients like soy lecithin (which sounds like something that could crawl out of ocean). In fact, check out what is actually in your fav name-brand chewy granola bar here. You make be shocked.

Homemade Chewy Granola Bars

Ingredients:

1 cup rolled oats
1/2 cup whole wheat flour
1/2 cup brown sugar, firmly packed
1/4 tsp. baking soda
1/4 tsp. baking powder
1/2 tsp. cinnamon
1/4 tsp. nutmeg
1/2 tsp. salt
1/4 tsp. vanilla
1/4 cup honey 
1 cup raisins, dried cranberries, chocolate chips, coconut, peanut butter chips or what ever your little heart desires (optional)

Combine oats, flour, brown sugar, baking soda, baking powder, cinnamon, nutmeg, and salt in a bowl and mix. Add the vanilla and honey, and mix well. Next, add your add-in and mix well to even distribute.

Press the mix evenly into a greased 8x8 pan. Bake at 325° for 18-20 minutes or until golden brown. Cool completely before cutting. 


What you will need

Our helper coconut oiling our pans.

Combine dry ingredients in a bowl

Mix well. I prefer the hand method.

Add your honey, vanilla, and add-in of choice. We chose raisins and dried cranberries for our batch.

Press evenly into pans. We did a quadruple batch which is why it doesn't match the 8x8 pan in the recipe. The recipe listed above will make one 8x8 pan (about 14 bars depending on how you cut them)

The final product!

Thanks for stopping and God bless!

Wednesday, February 6, 2013

Homemade Iced Coffee & Sweet Cream


I begin today's post with a quote from my twin brother, Eric. He LOVES his coffee and says this often. I thought it was an appropriate introduction to my Homemade Iced Coffee and Sweet Cream recipe. 

I know this is a bit out of season for some of my readers. It is February and freezing here in Minne-soota so many of you might not be thinking of iced drinks (maybe you are more interested in my Homemade Vanilla-Caramel Latte). 

However, in my desperate thoughts of summer, my iced coffee drink sneaks into my mind. I yearn for warmth and sunshine and let me tell you, there is nothing more magical then the warm morning Minnesota sun in July. I can see it now. Sitting on my cement steps in front of my tired old farm house after a morning run with my delightfully cold iced coffee in hand just soaking up the vitamin D with my jogging partner, Gus Gus.

....

Back to reality.

Okay, back to the iced coffee recipe. So in order to make your lovely iced coffee base you have to start with cold brew coffee. You can make cold brew coffee with a french press but if you don't have the funds to go and buy one you can make it on your own with nothing but ground coffee and water. 

So here is what you need to make your Cold Brew Coffee
  • A cup of ground coffee (any flavor you prefer)
  • A quart mason jar
  • Filtered or Distilled water


Pour your ground coffee into your mason jar and add enough water to fill it up to the top of the jar. I always leave a little head room at the top. Place the lid on the jar and give it a little shake to make sure that all the coffee grounds get mixed in with the water. 


Let the mixture sit for at least 12 hours. If you want a stronger brew, then leave it longer. I have let it sit for up to 24 hours (I forgot about it ;-) and it was very strong but if you like a stout cup then you will be just fine. 

After 12 hours filter the mixture through a strainer lined with a coffee filter. There is nothing I loath more then stray coffee grounds in my coffee so I run my coffee though the strainer a few times.


 This process takes a little time so you may want to find something to do while it is straining. Staring at it actually makes the process longer. 

You can, however, work on your sweet cream while you are waiting on your straining coffee. So, lets get started on that! 

What you need for you Sweet Cream: 
  • 1 14 oz. can of sweetened condensed milk
  • 1 12 oz. can of evaporated milk 

Wal-Mart generic. That's how I roll.

Combine your two ingredients and shake well to combine.

  
Alright, back to the coffee. Your cold brew should be strained by now and ready to go. 

Aren't they beauteous?

After all of that, you are so excited to try your iced coffee, arn't you?! I am exited for you! Yay!

Fill your cup with your desired amount of ice.

 
Add your cold brew coffee. This is all personal preference. If you like a stronger coffee flavor add more coffee to your cup. If you want a sweeter drink then add less coffee. I fill mine about 2/3 to 3/4 full of cold brew coffee.


Next, you add your sweet cream.

Isn't it pretty?
 That is pretty much it. Stir and enjoy and imagine it is 84° and sunny.


I don't condone the drinking of excessive caffeine drinks by a toddler but he steals my coffee and drinks it all. :-/


Thanks for stopping, enjoy sipping, and God Bless!
  

Monday, February 4, 2013

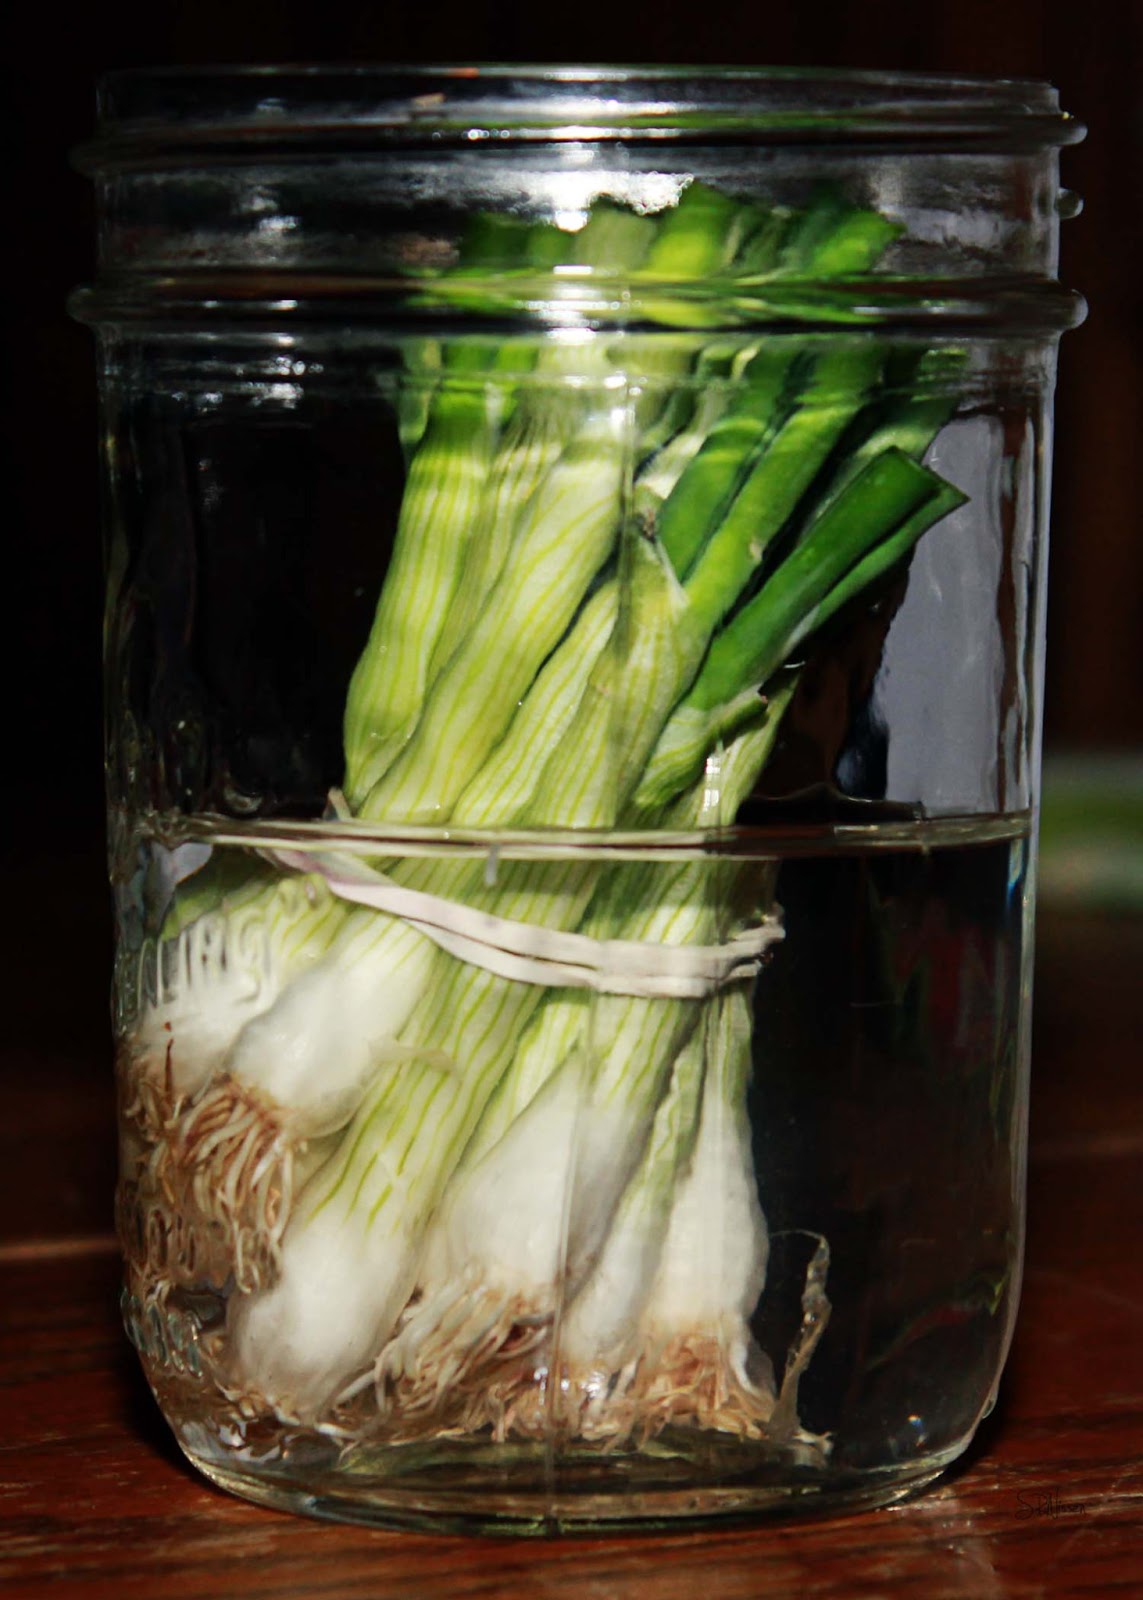
Regrowing Green Onions

Good morning! Today's post is under the Recipe tab but isn't really a recipe. This is basically just a kitchen tip but still a very neat one. 


 I have seen a few of these posts on Pinterest about regrowing certain vegetables in water. According to a few sites you can regrow store bought celery, green onions, and romaine lettuce in water. I tried to regrow celery in water but I only got a few little stalks and then it died. Sad face. So, when I saw this post on Pinterest I was a bit skeptical. However, I thought I would try it anyway. 

I bought some green onions and cut them down to about an two inches above the bulb. I chopped up the onions and used what I needed and froze the rest in a water bottle for easy dispensing (also a Pinterest tip ;-).

Day 1
Day 3
Day 6
Day 10
Isn't that the coolest!!?? The Day 10 pic was taken right before I cut them down again.  The roots got really long during the ten days but I did put them back in water again to try to regrow for a third time. I guess we will see what happens. 


Thanks for stopping and God Bless!

Friday, January 18, 2013

No Fail 'Hard Boiled' Eggs from the Oven


It's inevitable. Hard boiled egg disaster. I will never forget the year I was asked to bring Deviled Eggs to our annual Thanksmas celebration with my father. I feared the worst and I was justified in my fears. The Deviled Eggs were a complete catastrophe. I think there was maybe two that came out looking like actual eggs. The others...well, I was pretty ashamed. However, I brought my eggs to the party with my head held high. They were all still consumed in record timing so at least they tasted delicious. 

So all is well, right? Wrong! It has always bothered me that I can't peel a decent egg. It is one of those things that just drives me up the wall. Like burnt toast and broken bread and people who don't use their turn signals. So, after years of faulty egg peeling experiences, I have discovered a miracle here! Making my hard boiled eggs in the oven! It sound bananas, right?! But it works! I swear!  My sister also blogged on this hard boiled egg masterpiece at 31 Cups!


No Fail 'Hard Boiled' Eggs in the Oven

First, grab your eggs and place them in a muffin tin. It keeps them from rolling about.

Next, put them in a 325° oven for 30 minutes.


There it is. Thirty minutes later you have beautiful hard boiled eggs there weren't boiled. And the best part is that they peel perfectly! No more creepy looking Deviled Eggs! Hooray!


Note: The little specs are completely normal. They are just little imperfections on the shell that browned up in the oven. ;-) Also, they color up beautifully. 

Thanks for stopping and God Bless!

Homemade Vanilla Caramel Latte


Coffee just an A.M. thing? Not for this girl! Sometimes it is the only thing that I am able to consume until about two o'clock in the afternoon. Typically, I am a coffee with a little bit of creamer kinda gal. However, every now and then, I like to take it up a notch. I am such a rebel, I know. Like a faithful internet junkie, I found this recipe here via Pinerest like I pretty much find all of my recipes these days. A Homemade Vanilla Caramel Latte. That's right, folks. Complete with foamed milk and all! 

I know what you are all thinking, you Java-lovin' peeps. Does it taste just like Starbucks or Caribou? Well, I am not entirely sure because I live pretty much in the middle of nowhere Minnesota so the nearest coffee house is about 35 to 45 minutes away. However, you can guarantee that it is a fraction of the price of one of those crazy fru-fru drinks from Starbucks. And you can make it in your own house without even having to put your bra on. Can I get an Amen?


Homemade Vanilla Caramel Latte

Yield: Enough to fill 14 oz coffee mug with room for foam or whipped cream


Ingredients
  • 3 tablespoons French Vanilla Coffee-Mate Liquid Coffee Creamer
  • 2 tablespoons caramel sauce
  • 2/3 cup double-strength hot brewed coffee
  • 1 cup milk (I have used whole & 2%)
  • Optional: whipped cream and additional caramel sauce
Instructions
  1. In a large coffee cup, combine creamer and caramel sauce. Pour in your hot coffee and stir until everything is well combined.
  2. Heat milk (not to boiling) in small saucepan over medium heat, whisking constantly to create foam. You can use a wisk but I but if you have a Magic Kitchen Wand (other wise know as a handheld blender) it will create the most beautiful foam. Yay for thrift store gold!
  3. Remove milk from heat and carefully pour into your coffee cup. Use a wooden spoon to hold back the foam. Next spoon our beautiful foam into your cup. 
  4. Optional: Add whipped cream and additional caramel sauce on top and viola!
Congratulations! You have just shamed the nearest Starbucks by making a righteous latte all by yourself!
 
You can, of course, can alter it accordingly. For example, if you want to make on the skinny side, substitute for light creamer and skim or 1% milk.

I have also toyed with different variations of flavors. I tried Peppermint Mocha Latte as well. I just substituted the French Vanilla for International Delight's York Peppermint Patty creamer and then used chocolate syrup instead of caramel. 

Thanks for stopping and God Bless!

Pin It button on image hover